This easy, delicious recipe for white chicken chili popped up in my Instagram feed last fall and I knew it would be something perfect to fix in December when the family was here.
To say that it was well-received would be an understatement. There were absolutely no leftovers, and this recipe makes a lot of chili.
The only thing I did different from the original was use shredded rotisserie chicken instead of fresh chicken breasts in the crockpot, but both ways work. I also used roasted frozen corn from Trader Joe’s, which upped the flavor a bit. If you like things extra spicy, substitute jalapeños, either one can or both, for the diced green chilis.
Put all the ingredients into the slow cooker with chicken on the bottom, then top with a carton of chicken stock before turning on the heat.
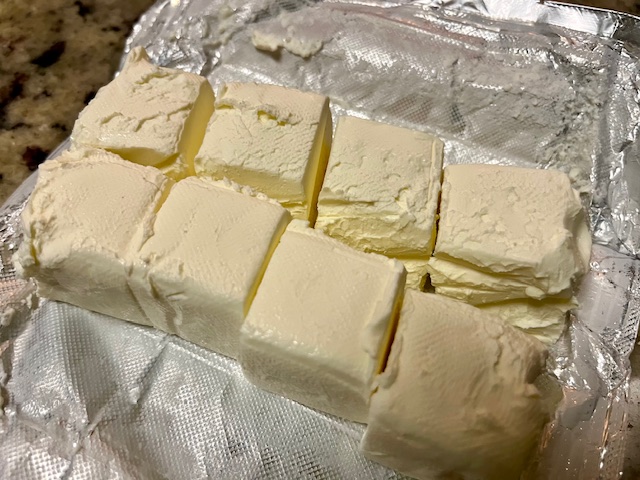
Cutting the cream cheese into small pieces helps it melt more quickly.
SLOW COOKER WHITE CHICKEN CHILI
4 large chicken breasts or shredded chicken from one rotisserie chicken
2 15-oz can great northern or cannelloni beans
1 12-oz package frozen corn
2 4-oz can diced green chilis
1 tsp chili powder
1 tsp cumin
1 tsp dried oregano
1/2 tsp garlic powder
1 32-oz carton chicken stock
1 8-oz package cream cheese
Optional: grated cheddar or Monterey Jack cheese, avocados, and fresh cilantro
Lay the chicken breasts or shredded chicken on the bottom of the slow cooker. Top with the beans, corn, diced green chilis, and spices. Pour over the chicken stock, then gently stir the beans, corn, chilis, and spices to blend. Cook on low for 8 hours, or high for 4 hours.
If using whole chicken breasts, remove from the slow cooker, shred, and return to the pot.
Just before serving, cut the cream cheese into small pieces and add to the slow cooker; gently stir until the cream cheese is completely melted.
Serve the chili in bowls. Top with grated cheese, avocado, and fresh cilantro if desired.
The #1 thing that’s been difficult, for us anyway, to find since we’ve been in Tennessee? Asian ingredients! They’re here, but finding them is at times like being on a challenging treasure hunt.
One of the most exciting gifts I received this past Christmas was 10 different CookDo sauces our son brought from Japan. We’re trying to limit ourselves to one packet a month, but it’s hard because he brought our favorites plus a few new ones we’re dying to trying. YaYu also gave me two jars of pad Thai sauce; rice noodles for that dish are somewhat easy to find but not the sauce.
Trader Joe’s carries a few Asian ingredients we use somewhat regularly: rice vinegar, dark sesame oil, tofu (both regular and baked), furikake, and occasionally miso paste. They just started carrying a fantastic peanut satay sauce. However, their rice selection is limited to basmati and jasmine – we enjoy them, but don’t use enough to warrant the purchase of a whole package. We also find some of their frozen Asian offerings to not be worth purchasing, although the current Korean products they offer are very good (Korean customers are snapping them up).
I order the Japanese-style rice we use from Amazon where a five-pound bag is $6.73. A few weeks ago I found two-pound bags of the same brand at a local supermarket for $6.89! Thankfully five pounds of rice lasts for a while as Brett and I typically cook just a little at a time.
The Asian sections in local supermarkets are woefully small with limited offerings, mainly a few sauces and marinades and a limited selection of (rice) noodles and ramen (instant and regular). Sprouts market has a larger section of Asian items, and some of the produce we can’t find elsewhere (things like bok choy, bean sprouts, Chinese pea pods, napa cabbage), but their prices are high. However, we can bulk buy jasmine and basmati rice there (meaning just enough for the two of us and not a whole package that would take forever to use). The same goes for Whole Foods: more Asian produce offerings but higher prices that make us think twice.
Some of our information about where to find ingredients has come from our daughter-in-law. There is a small Japanese market in Nashville we’ve been to with her although it’s somewhat difficult to get to, expensive, and has a limited variety of goods. Once a year is about the extent of our visits there. But, they carry a limited selection of CookDo sauces, soba noodles, and a few other products we like. World Market also carries some Asian items but again the selection is limited and can be expensive: a bag of KitKats is $9.00! It’s a good place though to find Japanese curry cubes, yakisoba noodles, Kewpie mayonnaise, and a few other things.
We recently discovered an Indian market just down the road from us, in the back of a nearby strip mall. Indian neighbors in our apartment complex say it’s a good place to shop. We can’t read any of the packages in the store but we’re going to stop there more often this year as their prices are good for things like lentils and produce. Next door to the store is a wonderful chai and samosa place – everything the sell is delicious so we’ll be stopping there as well – two big cups of fresh, hot chai and eight big vegetable samosas are only $10. We also recently learned of two other international markets that we are eager to check out, even though we dread going in and out of Nashville.
I can only imagine what it’s like for our daughter-in-law and other Asian immigrants in the area to find familiar foods or the ingredients necessary to make dishes from home. The markets are here, but often hard to find or with a small selection of foods and ingredients. We were incredibly spoiled in Oregon and Hawaii when it came to ethic stores and ingredients (especially Asian) but although they exist here finding them remains a challenge
I saw this dish in my Instagram feed in the fall of last year and had been wanting to make it as it sounded like something we would enjoy, everything except for the sriracha, that is. There is no sriracha on sushi in Japan, so I was confused as to why so much was used no matter which recipe I looked at. I thought about it a lot and finally figured out I could make a bake more “Japanese” by skipping the sriracha and using wasabi instead. My version turned out great, and my best critic (our DIL) said it was fantastic.
Sushinoko vinegar powder
I happened to have a package of sushinoko, a Japanese vinegar powder used to flavor rice for sushi. The vinegar flavoring for the rice is easy to do from scratch though, and I will include the ingredients for that below.
Seasoned rice topped with furikake
This sushi bake is basically a deconstructed California roll. Seasoned rice is pressed into the bottom of a 9″ x 13″ pan, then sprinkled with furikake, a Japanese seasoning made from seaweed and sesame seeds (Trader Joe’s sells it). A creamy mixture of faux crab, cream cheese, mayonnaise, diced green onion, and wasabi is spread over the rice with more furikake sprinkled on top again. The dish is baked and briefly broiled, rests for about five or so minutes, then is cut into squares and pieces placed on a piece of nori (seaweed) and topped with cucumber, avocado, and a dash of soy sauce. We ended up having to eat ours with a fork because the seaweed pieces I purchased were too small – they were impossible to pick up with our fingers.
The rice topped with the creamy crab layer and more furikake, ready to be baked and broiled.
We enjoyed the leftovers too – the bake is delicious whether it’s eaten hot or cold.
LAURA’S SUSHI BAKE
2 cups uncooked sushi rice
1 package sushinoko powder or vinegar blend (1/4 cup rice vinegar, 2 TBSP sugar, 1 tsp salt)
1/4 to 1/3 cup furikake, divided
8 ounces faux crab (surimi)
4 ounces cream cheese, softened
1/4 cup mayonnaise
3-4 green onions, both white and green, chopped
2 tsp wasabi (or to taste)
chopped or very thinly sliced cucumber
diced avocado
soy sauce
Cook the rice according to package directions; it should be quite sticky when done. While it is still hot add the sushinoko or vinegar solution and mix together well (the vinegar will make it slightly less sticky). Press the rice into the bottom of a greased 9″ x 13″ baking pan. Sprinkle half of the furikake over the top.
Blend together the faux crab, cream cheese, mayonnaise, green onions, and wasabi. Spread over the top and then sprinkle the remaining furikake over the crab mixture.
Bake for about 20 minutes, then broil for about two minutes to crisp up the top. Take out of the oven and let set for five to ten minutes.
Cut the baked rice and crab into small squares and set on a piece of nori; top with chopped cucumber and avocado pieces, then add a small dash of soy sauce. Pick up by hand with the seaweed to eat and enjoy!
Cooked and flaked salmon can be substituted for the faux crab.
Brett and I eat a nice variety of healthy meals. And, we do a good job for the most part sticking to our monthly budget of $500 per month for food. By leveraging my discount at Trader Joe’s and limiting what we buy at Costco and other grocery stores we keep our food expenses down without giving up quality.
However, at the end of last year I began to wonder if there were still ways I could simplify menu planning and shopping to change things up and save a little more. We’re doing a good job keeping food waste to a minimum and using what we have on hand, but by changing not only what we buy but how I cook I knew we could create additional savings while still enjoying tasty, healthy meals.
For the past year I’ve tended to purchase foods (including many prepared foods) that feed us for a night, or a night and lunch for one the next day, but mostly don’t provide enough for leftovers. Most of these meals come from Trader Joe’s. Their prepared foods are not only fun but healthy and satisfying, and they save time and effort, especially after I’ve worked that day. However, we can cut back on these types of items if I do a better job of planning ahead. I honestly don’t enjoy cooking as much as I did in the past, but I know how to create tasty, healthy meals that will last Brett and I for a couple of days and not cost more than what we’re paying now for something already prepared. I still want to include one or two prepared items into our bi-weekly menu plan, but that will be the limit.
We’re pretty much only buying items at Costco these days that provide affordable building blocks for meals or are cost effective. For example, a tray of their prepared stuffed peppers costs somewhere around $18, and contains six large peppers, which provides three meals for us. I could make them myself, but it’s nice having something already prepared (they freeze well) at only slightly over $6 for the two of us. The same goes for Costco’s prepared meatloaf meal – I pretty much can’t make it for less, and we can get three meals from the Costco one (two dinners and one lunch). I’m also going buy a $5 roast chicken each time I shop at Costco, use the meat from that for various meals, and make broth and or soup from the bones. Back when I was feeding five of us, I could often get four meals from one chicken so I know I can do as well now. We rarely buy produce at Costco any more though as the packages almost always contain more than we can finish, and we also skip meat, cheese, bakery and most deli items as there’s just too much in these packages as well (and they take up a lot of space). Our rule of only buying six or less items when we shop at Costco has kept us more mindful and saved us a bundle and we plan to keep that up.
Aldi will continue to fill in the gaps. It remains our go-to for several items, things like butter, graham crackers, organic produce (always less than Trader Joe’s even with my discount), and a few other items.
Menu items and meal prep will focus more on casseroles, soups, and quiches during cooler weather, and on main dish salads in the summer. These meals cost less than many of the prepared items I have been buying at Trader Joe’s and can provide two or more meals each week from one dish. We will still keep a couple of quick meals from TJ’s in the freezer for those evenings I’m too tired to stand in front of the stove.
This is an achievable goal for this year. I’m aiming for a savings of around $40 per month, at least at the beginning of the year, and more as the year goes along.
This is one of my all-time favorite fall and winter desserts. While traditionally viewed as a dessert, a crisp can be a wonderful, warm breakfast dish as well. This one is very easy to put together, and doesn’t require a lot of costly ingredients. Although it contains cranberries, it’s equally good made with only apples.
Right out of the oven!
I’ve been making this recipe for more than 40 years. It was passed along by a friend when we were living in Japan back in the early 1980s. She and I both shared an interest in natural and vegetarian cooking, and this recipe has stood the test of time. I particularly enjoy it because it’s not overly sweet, and the apple and cranberries complement each other beautifully. While the cranberries might make you think of this as only a late fall or Thanksgiving recipe, it can actually be made year-round because fresh cranberries can be frozen right in the bag they come in, and used whenever desired throughout the year. The apples can either be peeled or not, depending on your preference. I personally like unpeeled apples for their fiber and the color the peels add. Be sure to wash the apples well if you won’t be peeling them.
Unpeeled Granny Smith apples and fresh cranberries, drizzled with honey
CRANBERRY-APPLE CRISP
3 cups apple slices (about 5-6 medium apples
2 cups whole fresh or frozen cranberries
1 TBSP honey
1/2 cup chilled butter or margerine
1 cup rolled oats
1/2 cup whole wheat flour
1/2 cup chopped walnuts
3/4 cup firmly packed brown sugar
1/2 tsp vanilla
Preheat oven to 350°.
In a large bowl, combine apple slices and cranberries. Drizzle with honey and toss lightly to coat (this can be tough when the cranberries are frozen!). With a pastry blender, or in a food processor, cut butter into oats, flour and brown sugar (these days I freeze the butter and then grate it into the flour and sugar). Blend until crumbly. Stir in chopped walnuts and vanilla.
I freeze a stick of butter and then grate it in to make a crumbly topping – easy peasy!
Place the apple-cranberry mixture into a well-greased 9″ x 13″ baking dish. Cover the top with the oat mixture. Bake for around 50 minutes, or until browned and bubbly.
If using for dessert, this is delicious topped with vanilla ice cream or fresh whipped cream.
With Thanksgiving arriving this week, I thought it was time to once again post this collection of recipes for using up those Thanksgiving leftovers:
photo credit: The Washington Post
I’ve always believed that one of the best things about Thanksgiving was the leftovers, and in the past I always made sure we roasted a turkey big enough to give us several days of meals following the holiday. Even if we ate at someone else’s home, or went out to a restaurant, I would still either roast a small turkey or buy some roasted turkey breast, and make the sides so we could enjoy “leftovers” for a few days following Thanksgiving.
My favorite leftover dish has always been a nice, big hot turkey sandwich, very easy to prepare using leftovers, and 100% comfort food. Ron Paul’s restaurant in Portland always had a hot turkey sandwich on the menu, and it was what I always ordered whenever we dined there, no matter the occasion. Hot turkey sandwiches have always been our dinner the day after Thanksgiving, usually followed in order by turkey divan casserole (my version was adapted from a much fancier recipe), turkey Waldorf salad, a turkey pot pie, and we’ve always ended our turkey binge with turkey noodle (or rice) soup, made with a rich broth and filled with lots of meat and tasty vegetables. Our daughters especially love the turkey divan casserole, and it’s still requested any time we get together, no matter what time of year. The Waldorf salad is also good no matter the season, and a complete meal when served with a good crusty bread, like fresh sourdough or French bread. The pot pie is based on a recipe I saw in a magazine one year and although I keep my version pretty basic, there are loads of ways to adapt it.
Below are the recipes for our four favorite ways to use up Thanksgiving leftovers. None of them is complicated or fancy, but all are very, very good:
photo credit: Pinterest
HOT TURKEY SANDWICHES (for four)
4 big, thick slices of good sourdough or French bread
4 thick slices of turkey breast, enough to cover each slice of bread
Leftover stuffing
Leftover mashed potatoes
Leftover turkey gravy
Leftover cranberry sauce
Lightly toast bread slices and place one slice on each plate. Top with warm leftover stuffing and turkey slices. Reheat mashed potatoes and place a large scoop on each plate, then top everything generously with hot turkey gravy. Serve with leftover cranberry sauce.
photo credit: bettycrocker.com
LAURA’S TURKEY DIVAN CASSEROLE
1 16-oz bag frozen broccoli florets
2 cups turkey, either cut into 1-inch cubes or shredded
2 10.5-oz cans cream of chicken soup
milk
1-2 TBSP curry powder
salt & pepper to taste
1 16-oz bag eggs noodles
2 cups grated sharp cheddar cheese, divided
Preheat oven to 350°. Cook broccoli florets according to package directions; drain well. Cook egg noodles according to package directions; drain and set aside. In a large bowl mix together the cream of chicken soup, a small amount of milk (enough to create a thick but creamy sauce), at least 1 TBSP of curry powder (more if you want), and salt & pepper to taste. Add cubed or shredded turkey and 1 cup of shredded cheddar cheese to the sauce and mix well. Add the cooked broccoli florets and noodles to the turkey mixture and combine well. Pour into a 9″ x 13″ baking dish and top with remaining 1 cup of cheddar cheese. Bake for 35-40 minutes, or until the casserole is bubbling and the cheese is melted and browned on top.
photo credit: simplyrecipes.com
EASY LEFTOVER TURKEY POT PIE
Crust for 2-crust pie (premade crusts are OK)
1 1/2 cups shredded or diced turkey
3/4 cup frozen peas
3/4 cup carrots cut into 1″ pieces
3/4 cup potato, cut into 1″ pieces
1/2 cup diced onion (optional)
1/2 cup mushrooms (optional)
2 cups leftover turkey gravy
salt & pepper to taste
Preheat oven to 400°. Prepare crusts for a double-crust pie. Line the bottom of a 9″ pie plate with one crust. Steam together the peas, carrots, and potatoes until tender but not soft or mushy (or use already cooked leftover vegetables instead). Combine the vegetables and turkey in the pie plate up to the top edge, then pour turkey gravy over everything (if the gravy is thin, you can thicken first with 1-2 tsp of cornstarch; also, depending on how much turkey and vegetables are in the pie, the entire 2 cups of gravy might not be needed). Cover the pie with the top crust, crimp the edges to seal, and make five small cuts in the top to vent. Bake at 400° for 30-35 minutes, or until the crust is golden and the pie is bubbling. Let cool for at least 10 minutes before serving. Serve with cranberry sauce, if desired.
photo credit: simplyrecipes.com
TURKEY WALDORF SALAD
1 large apple, washed, cored, and cut into 2″ pieces
2 ribs of celery, cut into 2″ pieces
3/4 cup red or green grapes
1 cup turkey, cut into 2″ cubes
1/2 cup walnut halves or large pieces
1/2 cup dried cranberries (optional)
1/2 cup mayonnaise
1/2 cup non-fat plain yogurt
1 TBSP curry powder
In a large mixing bowl, combine apples, celery, turkey, and walnuts (and dried cranberries, if desired). In a separate bowl mix together mayonnaise, yogurt, and curry powder until well blended. Pour over salad and combine all. Serve chilled with some good crusty bread.
Other great leftover turkey recipes are Kentucky Hot Brown sandwiches (turkey and bacon on toasted bread with a big tomato slice on top, then covered with either a Mornay sauce or cheesy rarebit sauce); Goodbye Turkey casserole (a creamy turkey and rice casserole), and of course, a big pot of turkey noodle or turkey rice soup!
It’s good for me to visually take inventory once in a while of how we spend our money, especially on food. I haven’t done it in a while, but in September we were starting out with an almost empty fridge and freezer and I thought this would be a good time to take photos of what we bought to not only see how much we spent on food (and alcohol) but also what we were able to buy within our food budget of $500.
I sort of stuck to my plan of shopping once a week: we did one “big shop” on the first and and a smaller fill-ins throughout the month. Truth be told though, I just don’t enjoy food shopping enough to do it every week. Maybe that has something to do with working in a food store.
Gluten-free (and dairy-free) products take up a larger percentage of our food budget these days as they are a bit more costly than regular items. I buy most of our GF products at Trader Joe’s – some are better than others – but we did check out what Whole Foods has to offer and bought a couple of items there. My stomach remains a whole lot happier these days without gluten (and lactose).
Anyway, here’s everything we bought in September:
Whole Foods/Sept 1: We bought two packages of GF baguettes which were on sale (and otherwise unaffordable), and a big piece of GF carrot cake that we split for dessert. We plan to get the cake again sometime – it was delicious – but the GF bread was just OK. Total spent: $23.38.
Costco/Sept 1: We hadn’t shopped here in a while but wanted to check out gluten free offerings as well as get coffee, tea, and naproxen sodium. The items we ended up purchasing were: Kirkland brand naproxen sodium, a twin pack of Rao’s sauce, a big bag of organic chicken sausage links, a 3-pack of GF cheese pizzas (which are surprisingly good), a package of rice noodle ramen, Thai-style coconut curry chicken, five pounds of organic oatmeal, a pan of stuffed bell peppers, and two packages of GF oatmeal-chocolate chip cookies. We also bought a flat of bottled diet green tea with lemon (not pictured), six pounds of coffee (not pictured), two bottles of pinot grigio, and a bottle of pinot noir. Total spent: $188.27. Some of this food and beverage will last into next month and beyond.
Liquor store/Sept 1: We bought a bottle of rum and two bottles of club soda for $25.12 (for mojitos)
Aldi/Sept 1: Less than $20 ($19.26) for two packages of mild Italian sausages, a package of cilantro, a package of fresh mint, two boxes of graham crackers, two packages of instant mashed potatoes, a can of chickpeas, a bag of mini chocolate chips, a can of kidney beans, and a can of green beans.
Trader Joe’s/Sept 1: Our TJ’s total for everything was $145.45 (after discount of $34.48). I’ve divided up what we bought into five photos.
TJ’s afterschool kid snacks: marshmallows, meringue cookies, dark chocolate-covered pretzels, popcorn, and baked cheese curls
Bakery items: two loaves GF multigrain bread, two loaves GF cinnamon raisin bread, two packages GF muffins (chocolate and cinnamon coffee cake), one box GF madeilines, one loaf of multigrain sandwich bread
Grocery items: one pound thick cut bacon, two dozen eggs, two cartons nut milk, a bottle of canola oil, a jar of minced garlic, a bottle of furikake, a jar of vegetable soup, a carton of chicken broth, and a half pound of TJ’s Unexpected Cheddar.
Frozen: frozen blueberry waffles, GF waffles, two packages of beef bulgogi fried rice, frozen green beans, frozen broccoli florets, beef birria, breakfast eggwiches, oat milk chocolate fudge bars, brownie crisp coffee bars, and dairy-free Very Chocolate frozen dessert.
Produce: An organic coleslaw kit, a pound of fresh figs, a package organic onions, organic zucchini, a head of cabbage, one pound of organic tomatoes, a package of shishito peppers, two russet potatoes, a bag of organic baby kale, a package of green onions, and five organic bananas
Miscellaneous: a package of toilet paper and a bottle of Mangotini (Bellini made with mango juice versus peach – delicious!)
This first round of shopping left us with $98.52 for the second part of the month. I did a quick shop at Trader Joe’s a week after the first big shop for few more things (mostly gluten free) and then shopped again two weeks later. The first round I spent $36.34 (after discount of $9.09).
Trader Joe’s/ Sept 8: GF chocolate chip brownie mix; GF chocolate chunk cookie dough; GF bagels; chicken salad; lactose free cream cheese; GF hamburger rolls; shaved beef; French fries; and Unexpected Cheddar spread with hatch chilis. I made beef sandwiches topped with the Unexpected Cheddar spread, French fries, coleslaw for our Friday night dinner with our DIL and grands, and served GF brownies and freshly-baked GF cookies for dessert!
When fall items started rolling in we bought the following must haves for $13.42 (after discount price of $3.35):
Trader Joe’s/Sept 14: Gluten free pumpkin pancake mix, gluten free pumpkin baking mix, and pumpkin-caramel Kringle (for Brett and the grandkids). We’ll be getting a whole lot more of the pancake and baking mixes before the season is over!
We finished up the month with another small shop at Trader Joe’s to get us through until the end of the month. We had $48.76 left in the budget; I spent $53.88 (after discount of $13.33). There were a few things I normally wouldn’t have gotten, but our grandchildren had dinner with us on two nights at the end of the month which meant pizza and pigs in a blanket as well as ice cream cones (they’re not adventurous eaters). We had also run out of dog treats.
Trader Joe’s/September 20: Bag #1: mint, cucumber chunks, a cucumber, bag of carrots, individual cheese pizzas, pork tenderloin roast; mini ice cream cones, tater tots, Pastry Pups (pigs in a blanket), vegan butter spread, and gluten free chicken nuggets,
Trader Joe’s/September 20: Bag 2: whole wheat hamburger buns, (more!) cilantro, roasted seaweed, six organic bananas, organic coleslaw mix, an avocado, one pound of roasted peanuts, bacon-pumpkin dog treats, sweet chili sauce, salmon skin dog treats, ginger-miso broth, and two potatoes.
Total spent in September: $505.12, just slightly over budget. Without all the booze we would have made it.
For all that, some of the meals we enjoyed this month included Zuppa Toscana; baked potatoes with broccoli, cheese, and bacon; zucchini frittata and Italian sausages; pad Thai; California roll salad; beef birria tacos with roasted shishito peppers; waffles and sausage “breakfast for dinner;” soup and grilled cheese sandwiches; coconut curry chicken with rice; stuffed bell peppers; shaved beef with chili cheddar cheese sandwiches; bulgogi fried rice; pork & vegetable fried rice; noodle bowls with roast pork; and more!
And, we enjoyed mojitos on the weekends!
Everything we bought fit nicely into the freezer and refrigerator and was easy to track thanks to last month’s clean out!
I adore pumpkin, and love cooking with it, especially when fall rolls around. Below are my personal five favorite pumpkin recipes, from breakfast to dinner, and dessert too!
photo credit: livewellbakeoften.com
#1:Pumpkin Bread Pudding
I love bread puddings, especially because they’re so versatile and, depending on the ingredients, can be used for breakfast, as a main dish, or as a dessert, and this one with pumpkin was a great addition to my collection of favorites. I’ll never forget that Meiling’s reaction when she took her first bite of this was, “It tastes like Christmas!” I remember as well that the whole house smelled like the holidays when the pudding was baking.
One fun thing about making a dessert bread pudding is that you don’t have to stick entirely with the bread called for, or even entirely with bread for that matter. Leftover muffins, pound cake, croissants, and other baked items can be added to the regular white or French bread or whatever that’s typically called for to punch things up a bit. I like to use challah, a sweet egg bread, for dessert bread puddings, but brioche is delicious as well.
I usually lighten things up a bit with this dish and use nonfat milk instead of heavy cream. I also use actual rum for the flavoring, but rum extract would probably work just as well, as would vanilla. I also skip adding the butter on top. Raisins or chopped pecans are walnuts are also a nice addition to the recipe, layered in among the toasted bread.
Leftovers are delicious for breakfast, so besides being a great dessert this also works well for a breakfast/brunch dish. I usually served it with a spoonful of vanilla yogurt in the morning, but whipped cream or ice cream are added otherwise.
PUMPKIN BREAD PUDDING
4 cups white bread, cut into small cubes
4 whole eggs
3 egg yolks
1 1/2 cups milk
1 1/2 cups heavy cream
3/4 cup pumpkin puree
1 cup granulated sugar
1/4 tsp salt
1 TBSP rum or brandy
1/4 tsp nutmeg
1 tsp cinnamon
1/4 tsp ground cloves
2 TBSP cold butter, cut into pieces
Preheat oven to 350°. Place the bread cubes on a large baking pan and toast in the oven for around 10 minutes.
Place the toasted bread cubes in a well-greased 9″ x 13″ pan. In a large bowl, whisk together the milk, cream, eggs, yolks, pumpkin puree, sugar, salt, rum or brandy and spices; stir until well-blended and sugar is dissolved. Pour mixture over bread cubes.
Let everything sit for around 10 minutes, or until all the bread is fully soaked. Place pieces of butter around the top of pudding, then bake for 40-50 minutes, or until center is set but not dry.
Pudding can be eaten warm or chilled.
#2:Addictive Pumpkin Burritos
photo credit: allrecipes (I think someone went a little nuts with the cilantro)
These burritos are not only delicious and easy to make but the ingredients don’t cost a lot either. They’re quite nutritious, and surprisingly low fat (and can be vegan with the cheese left out). They can also be wrapped individually and frozen to reheat later for snacks or a quick meal.
The original recipe called for cooked and mashed sweet potato, but I substituted pumpkin and it worked perfectly. With pumpkin, add the water to the bean mixture gradually though as canned pumpkin tends to be a bit “wetter” than baked sweet potato and the bean mixture doesn’t need to quite so wet (which risks making the burritos soggy). Canned refried beans can be substituted for the kidney beans in the recipe to save on time, although I personally never thought it took all that much time to mash the kidney beans. There’s no reason either why other types of beans, such as black beans or pintos, couldn’t be substituted if you prefer them, and pureed butternut squash or a large can of sweet potatoes (follow the same advice about adding the water) can also be substituted. The spices might seem excessive to some, but I happen to think they’re just enough (and we have also added salsa as well). The friend who sent me the recipe halved the chili powder, cumin, mustard and cayenne pepper and said they still tasted great.
If you do end up with some leftover bean mixture it can be added later to scrambled eggs for a breakfast burrito!
ADDICTIVE PUMPKIN BURRITOS
3 tsp vegetable oil
1 medium onion, chopped
4 cloves garlic, minced
6 cups canned kidney beans, drained
2 cups water or less, as needed
3 TBSP chili powder
2 tsp ground cumin
4 tsp prepared mustard
pinch of cayenne pepper (optional)
3 TBSP soy sauce
4 cups cooked and mashed pumpkin puree, sweet potato, or butternut squash
12 10-inch flour tortillas, warmed
8 oz. shredded Monterey Jack cheese (or Pepper Jack if you’d like a little more spice)
Preheat oven to 350°. Heat oil in a medium skillet, and saute onions and garlic until soft. Add beans and mash well. Gradually stir in water, and heat until thick and warm. Remove from heat and stir in chili powder, cumin, mustard, cayenne pepper (if using) and soy sauce. Divide bean mixture and pumpkin puree evenly between the warm tortillas; place next to the lower edge and top with some cheese. Fold the edge over tightly, then fold up the sides and fold over again to close. Bake for 12 minutes in the oven and serve warm. Chopped green onion and sour cream go well with these burritos.
#3:Pumpkin Apple Pancakes
photo credit: Sunset Magazine
I don’t know about anyone else, but I occasionally seem to have a bit of pumpkin puree left over whenever I make pumpkin bread, or other pumpkin recipes. I won’t throw it away, but it’s still never enough to where I can easily figure out how to use it. But, when I found this recipe in Sunset magazine, I knew I had found a perfect and delicious way to use up that last bit of pumpkin.
PUMPKIN APPLE PANCAKES
1 large egg
1 cup milk
2 TBSP vegetable oil
1/2 cup pumpkin puree
1 cup flour
1 TBSP sugar
1 TBSP baking powder
1/4 tsp each salt, nutmeg and cinnamon
1 apple, peeled, cored and chopped or grated
Butter and maple syrup
In a medium bowl, mix together flour, sugar, baking powder, salt, nutmeg and cinnamon. In a separate bowl, whisk together egg, milk, vegetable oil and pumpkin puree, then blend together with flour mixture. Heat a griddle or non-stick frying pan; as it heats peel, core and chop or grate apple and add to the batter. Spoon approximately 1/3 cup of batter onto hot griddle or pan to make each pancake, and cook, turning when edges are cooked and bubbles appear. Serve with butter and maple syrup, or the topping of your choice.
#4:Pumpkin Bars with Cream Cheese Frosting
photo credit: chocolatewithgrace.com
I think our whole family would agree that these pumpkin bars with cream cheese frosting are at the top of our list of ways to enjoy pumpkin. The bars are rich and moist, and the frosting adds just the right amount of sweetness without being overpowering. Mini chocolate chips can be substituted for the nuts if you want to take it to the next level.
PUMPKIN BARS WITH CREAM CHEESE FROSTING
For the bars:
2 cups flour
2 tsp baking powder
2 tsp cinnamon
1 tsp baking soda
1/2 tsp salt
4 eggs
1 2/3 cups sugar
2 cups pumpkin puree
1 cup vegetable oil
1 cup chopped pecans or walnuts (or mini chocolate chips)
For the frosting:
3 oz. softened cream cheese
1/4 cup softened butter
1 tsp vanilla
2 cups powdered sugar
Preheat oven to 350°.
In a large bowl, blend together flour, baking powder, cinnamon, baking soda and salt; set aside. In a medium bowl, beat the eggs, then add sugar, vegetable oil, and pumpkin stirring until well mixed. Add pecans (or walnuts or chips). Pour into a well-greased 10″ x 15″ x 1″ (jelly roll) pan and bake for 20-25 minutes, or until lightly golden and set. Cool and frost.
To make the frosting: Beat cream cheese and butter together until fluffy; add powdered sugar and vanilla and beat on high speed until smooth. Frost when bars are completely cooled. Makes 32 bars.
#5:Coconut Curry Chickpeas with Pumpkin & Lime
photo credit: The New York Times
As far as ease of preparation and great flavor this recipe knocked it out of the park for me. This yummy curry recipe comes from the The New York Times via a recommendation from Reader Laurel, to whom we are forever grateful.
The list of ingredients looked rather intimidating at first, and I thought it might be a tricky recipe to get through, but once all the chopping was done and the cans opened it came together very quickly and easily. Garam masala, an Indian spice blend used for curries, is not an easy ingredient to find, but I actually have a small jar purchased from Penzey’s spices earlier this year when I was putting together the pantry. Besides curries, garam masala is used in dishes like tikka masala and butter chicken. Indian cooks traditionally make their own garam masala, but Penzey’s affordable blend is a worthwhile addition to my spice shelf. I also keep a bag of jalapeños in the freezer – they are a little soft when defrosted but can still be seeded and have as much flavor as fresh ones. The two small-ish peppers I added were just enough heat for us without being too spicy, but more jalapeño can be added if hotter is preferred.
COCONUT CURRY CHICKPEAS WITH PUMPKIN & LIME
3 tablespoons vegetable oil
1 large onion, chopped
2 small jalapeños, seeded or not, thinly sliced
1 bay leaf
1-inch piece of fresh ginger, minced
4 garlic cloves, minced
1 ½ teaspoons garam masala
1 teaspoon ground cumin
½ teaspoon ground turmeric
Two 15-ounce cans chickpeas, rinsed
One 13.5-ounce can coconut milk (do not use light coconut milk)
One 15-ounce can pumpkin purée
1 ½ teaspoons salt
¾ cup chopped cilantro, (additional for for serving, if desired)
2 to 3 tablespoons fresh lime juice, plus wedges for serving
Cooked basmati rice
Heat oil in a large skillet, then sauté the chopped onion, jalapeños, and bay leaf until the onion starts to turn golden, about 8 minutes. Add the ginger and garlic and cook and additional 2 minutes, stirring frequently. Stir in the garam masala, cumin and turmeric and cook for an additional 30 seconds.
Add the chickpeas, coconut milk, pumpkin, 1/2 cup water and 1 1/2 teaspoons of salt to the pan. Simmer for 10 minutes, stirring occasionally, to let the flavors come together. (You can add more water if it becomes too thick.) Finally, stir in the chopped cilantro and add lime juice to taste.
Serve the curry over rice and top with more cilantro and lime wedges on the side. The Times also suggest couscous as an alternative to rice.
Sometimes we joke at work that TJ’s is really a snack shop very cleverly disguised as a grocery store.
Working at Trader Joe’s has had an obvious welcome effect on my menu planning. Seeing TJ’s products every time I’m there, and learning about new or upcoming products means my menu plan is almost constantly on my mind in one way or another!
But, does working at Trader Joe’s actually make menu planning easier? The answer to that would be yes . . . and no. Sometimes I feel overloaded with too much information and too many products I want to try.
I love talking to customers and fellow crew members about what products they like. Some things others love are dismissed quickly because of the cost (too expensive even with the discount) or the ingredients – I still can’t get over how many products contain milk and/or wheat.
The week before we shop is spent going over a tentative menu plan and the accompanying shopping list, making sure nothing is left off or forgotten. I have yet to make a plan though that isn’t changed more than a few times; same for the shopping list. There are products at TJ’s I’d love to try and they get added to the menu plan and shopping list again and again but get removed again and again as well, as they’re wants and would take us over our budget. Case in point: the spatchcocked lemon rosemary chicken. It has appeared and disappeared off my shopping list more times than I can count. Customers rave about it, it looks and sounds delicious, but I just can’t justify the cost (and that much chicken) for the two of us.
While menu planning has always helped me save, working at Trader Joe’s has had one great benefit: impulse buying rarely happens. There is almost always a product, both new and old, to sample in the break room, but those tastings have kept me from buying more than a few things that sounded good but turned out to be something we wouldn’t like. Working at the demonstration cart has also helped change up my menu plan more than a few times, introducing me to products I might otherwise have passed up.
So, does working at Trader Joe’s help the menu planning process? Yes . . . and no. I’ve learned to be patient about products and bide my time and let the budget rule. Still, there’s an awful lot of good food at TJ’s to wrap my head around which keeps planning a bit more difficult than imagined.
The state of our refrigerator at the start of August, a jumbled mess. I could barely tell you half of what was in there.
In this past year we’d pretty much organized and simplified everything in our kitchen, everything but the refrigerator, that is. It remained an unorganized disaster. I was determined to get a handle on it, simplifying what we had in there and how much we kept in there.
We seem to have always had way too many condiments and sauces, produce that gets lost, and a freezer filled to overflowing – something had to give. Last month I started a project to use up and/or eat down more of what we had in the fridge and see if we could end up up with a simple organizational scheme that would be easy to maintain.
There was at least one thing we were doing right: using glass containers and silicone bags for leftovers so we could see what was on hand. Items in these container were usually used in a timely manner because they are usually stored near the front. Brett is the leftovers master; he will put together some weird combinations from time to time, but stuff he can see will be eaten. I keep a running tally in my head of the most perishable items so they get eaten or used sooner rather than later, but I miss some more frequently than I’d like and they have to be tossed.
Still, the refrigerator was always disorganized. I don’t know if that’s because we bought too much food at once, or because we had never come up with a way to organize the space properly. Everything else mostly ended up in a hodge-podge and I always seem to be rooting through what we had to find what I needed or what could be eaten.
Simplifying the refrigerator required taking a few steps:
We used up much of what we already on hand, especially condiments that were purchased for one recipe, like dill pickle slices I bought to make Cuban sandwiches or Dijon mustard bought for some other recipe. Both just sat there and took up space. There were a few other odds and ends that with effort we were able to get rid of as well. I’m more conscientious going forward about buying one-off ingredients for a recipe that I know I would be hard-pressed to use later.
We stopped buying so much when we shopped. We were shopping every two weeks or so, but breaking that down to a weekly shop has made it much easier to keep track of what we have and avoid clutter.
We pay better attention to everything that‘s in the refrigerator. There always seemed to be several items in the fridge that went off our radar. And, I admit to choosing things I wanted to eat versus what needed to be eaten to use them up. I always take leftovers to work for lunch, but at home I rarely eat leftovers, and while Brett is good about them, he can’t eat them all. I now check the refrigerator daily to know what we have and make more of an effort to eat leftovers for breakfast or lunch when I’m home.
We instituted a “clean out” meal once a month. On the last Friday of August we used up several items to create dinner rather than open or fixing anything new. We plan to do this monthly.
After a month’s efforts, we have a simpler, more organized fridge! It’s a pleasure to open these days.
I constantly remind myself the goal is to have a clean, simple, organized refrigerator. This goal helped us shop more efficiently last month, and actually buy less. Also, if I know something is going to produce leftovers, I’m more conscientious about working those into the menu plan. I think more carefully about how the food we purchase will be stored, how we will use it, and how many leftovers it will generate. I’ve decided to buy more pre-cut vegetables that I know will be used up more quickly and not get lost in the produce drawers.
Our refrigerator will always be a work in progress, but I hope to maintain the neater, more organized, and simpler refrigerator and freezer we ended up with last month. It’s just the two of us these days, and I know we can continue to cut back on what we buy, make, and have leftover, giving us a simpler, well-organized refrigerator where we can find things easily and that’s also a delight to open.